Here is the detail instruction on odometer correction for Mercedes Benz S-class (W221) and CL(W216) vehicle models with OBDⅡ FVDI ABRITES Commander for Mercedes Benz diagnosis.
- Backup important files
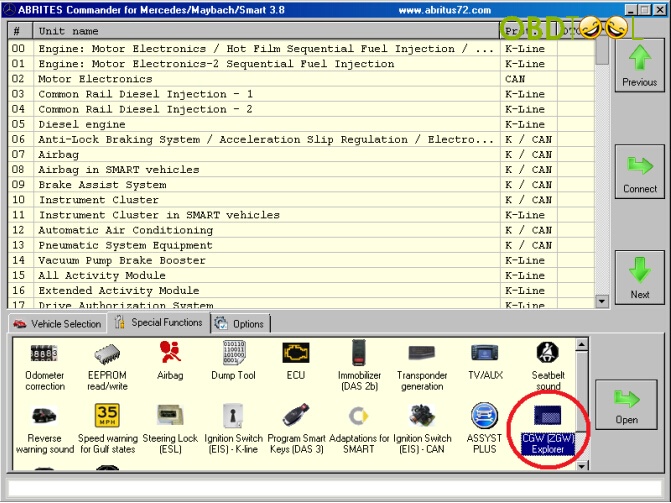
Open Special Function “CGW (ZGW) Explorer” to read the EEPROM and the flash memories of Central Gateway (CGW) control. Back up EEPROM and the flash dumps as files in your hardware.
FVDI ABRITES will automatically back up EEPROM and the flash memories file when it reads them. The backup files should be installed on C:/Program Files/ABRITES software for IDXXXXXX/Mercedes.
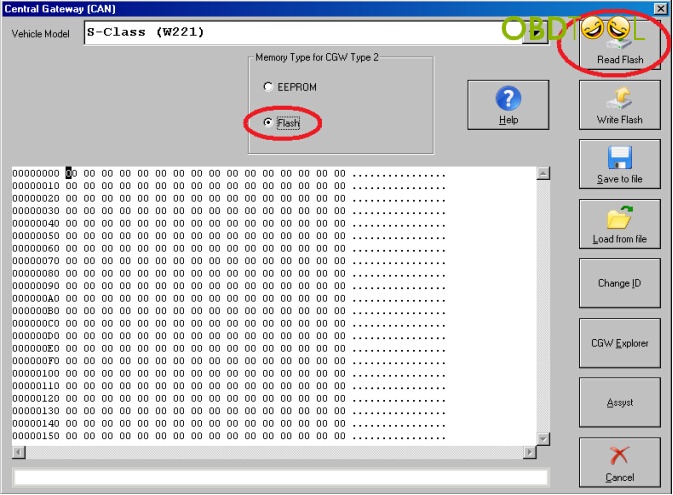
Select vehicle model, like S-class W221

Select EEPROM, click Read EEPROM and save it to a file after EEPROM has been read.

Select Flash and click Read Flash and save it to a file after FLASH has been read.
- Modify ASSYST and ASSYST PLUS service history records
Open Special Function “ASSYST PLUS”. Select the ZGW type “W221”. Click “Get Current” button to see the internal data that is stored inside ASSYST PLUS module.
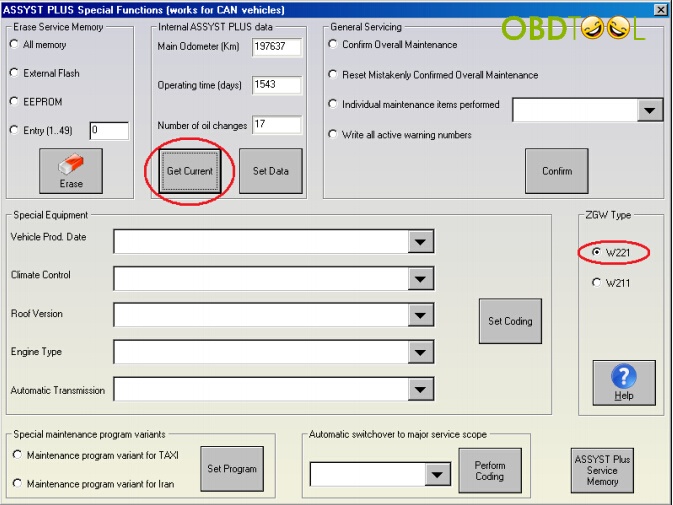
Click “ASSYST PLUS Service Memory” to view different service history. Enter “Main Odometer”, “Operating Time (Days)” and “Number of Oil Changes” to alter all this information. Click “Yes” when FVDI ABRITES program asks to set the information for the different service history records. Enter detail for each record.
For example: If your vehicle has 3 records, you need to enter the details for 3 service intervals. The values for the day cycle counter should be entered in an increasing way. Here is the record example. You can verify them as you wish.

- Change the main Odometer in Dashboard, EZS & CGW
Next you should change the odometer in Instrument Cluster as well as in EZS and CGW module.
Open “Odometer Correction” special function and select vehicle as S-class W221. Then click “Get Odometer” button.
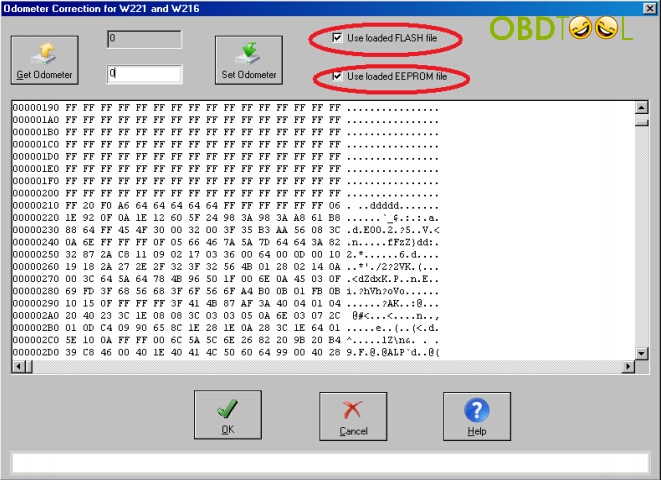
Select “Set Odometer” to load EEPROM and Flash dumps
NOTE: Make sure the ignition is ON when click “Set Odometer” button.
- Change the odometer in other devices
Select Electronic Parking Brake/Regenerative Braking System to change the odometer in this module.

Select Tire Pressure Monitor in FVID ABRITES menu to change the odometer id this module.

You can open the “Actual Values” windows and check the stored Messages and Activation values. If you want to change these values, click Activation Tests button. Three options are available, click “Start Test” button after choose one.

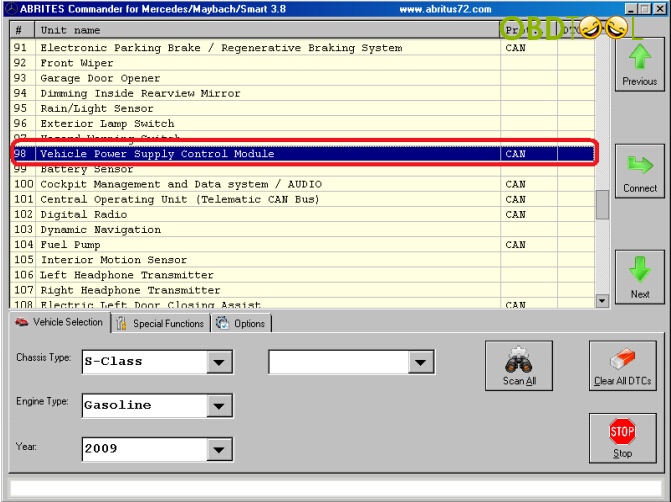
Select Vehicle Power Supply Control Module and click the “Activator tests” button from the drop-down box. Then open the Actual Values windows and check the displayed odometer values.
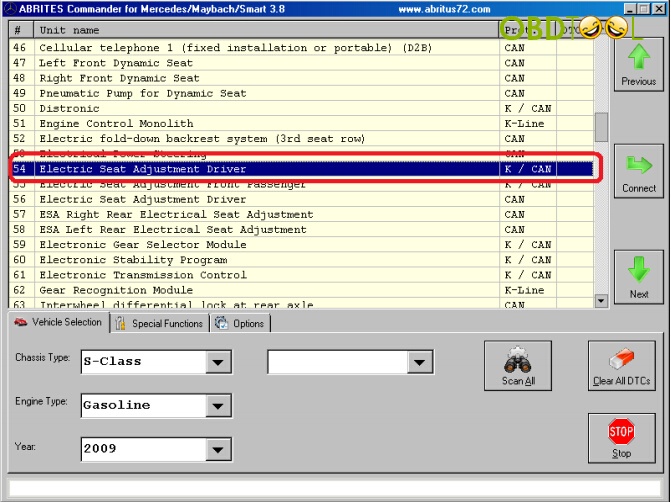
Select Electrical Seat Adjustment Driver and click “Activator tests” button. Then click “Output Tests” button from drop-down box to check the displayed odometer values. If you see the value that unavailable, ignore it. .
Select Electric Seat Adjustment Front Passenger and do previous setting
Select Diesel Engine Control Unit and do previous setting
- Clear DTCs
Erase all error codes that may have been stored in ECU control modules
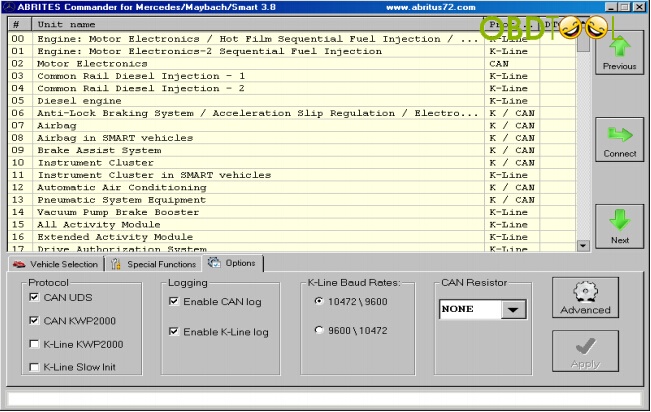
NOTE: Leave only the setting “CAN UDS” and “CAN KWP 2000” protocols setting when clearing error codes which will make the procedure faster.