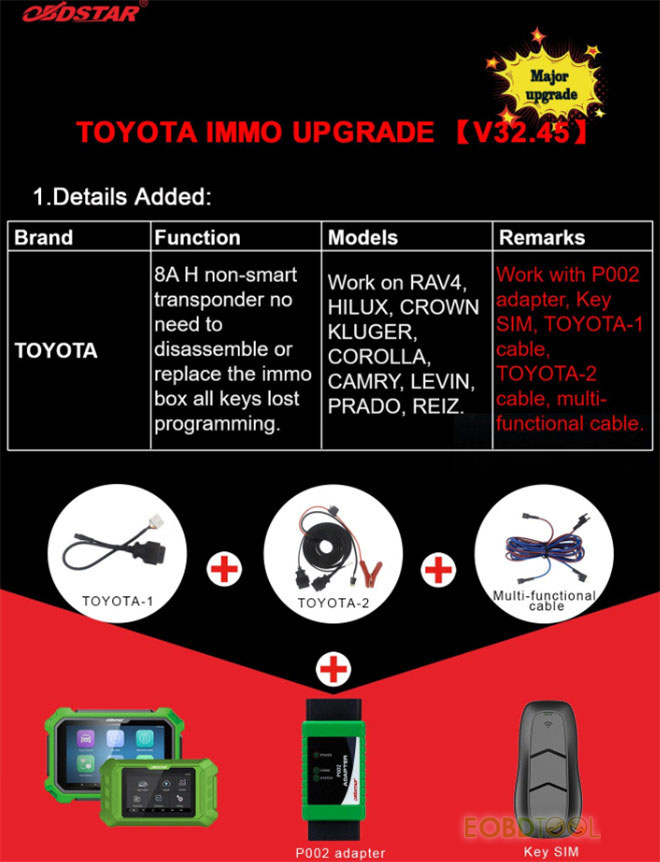
One of the newest functions of OBDSTAR X300 DP Plus and X300 Pro4 is to do 8A H non– smart transponder all keys lost programming on TOYOTA RAV4, HILUX, CROWN, KLUGER, COROLLA, CAMRY, LEVIN, PRADO and REIZ no need to disassemble or replace the IMMO box. (Partial US 8A H car models are not supported currently.) The OBDSTAR TOYOTA 8A All Keys Lost Programming Cables and OBDSTAR Key SIM are required.
Why need OBDSTAR TOYOTA 8A All Keys Lost Cables?
In normal situation, TOYOTA 8A H blade keys can’t be added or erased in all keys lost except changing expensive new IMMO box. So TOYOTA all keys lost cables are developed, by which diagnostic device can read IMMO data and make master key to start the vehicle. The master key will help to add and erase keys.
OBDSTAR TOYOTA 8A All Keys Lost Cables overview:
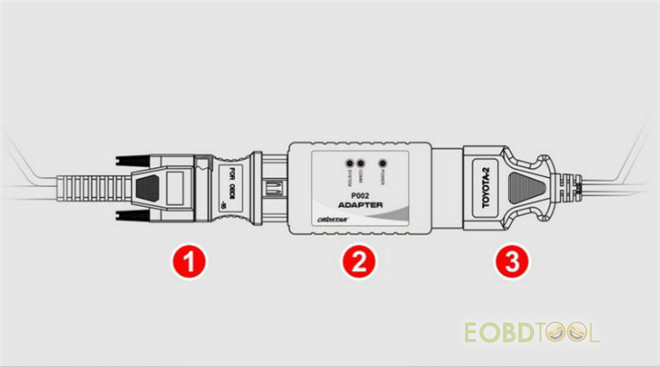
The package includes P002 Adapter, TOYOTA-2 cable, TOYOTA-1 cable, and multi-functional cable.
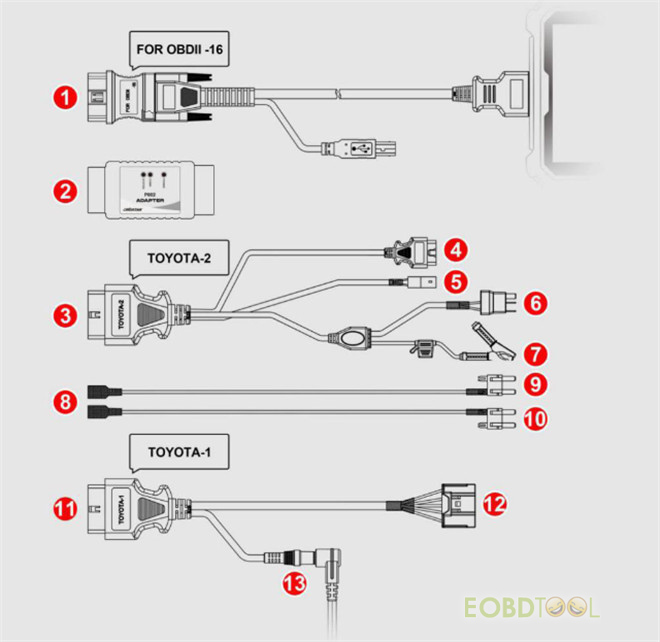
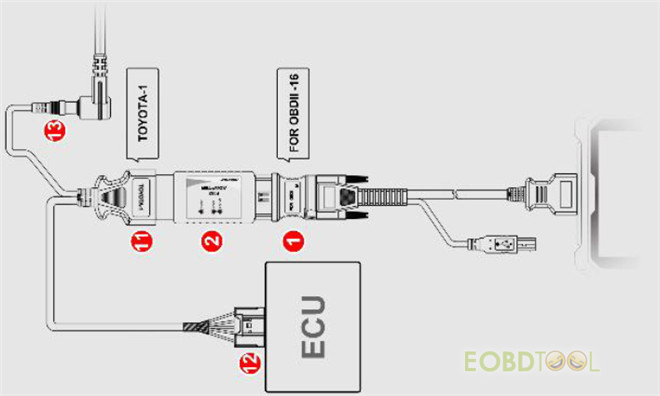
1.Diag cable OBD connector (male)
2.P002 adapter
3.Connect P002 connector (female)
4.Connect vehicle OBD diag connector (male)
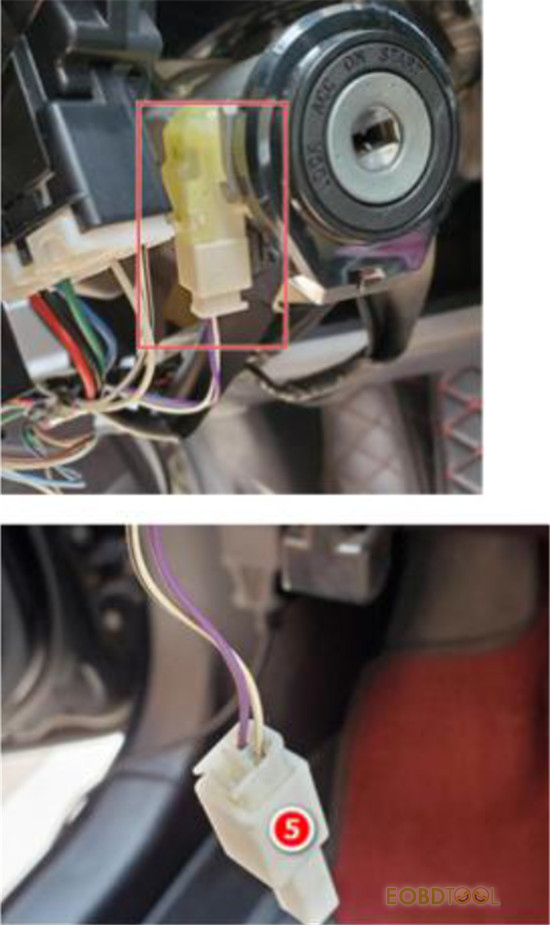
5.Lock plug
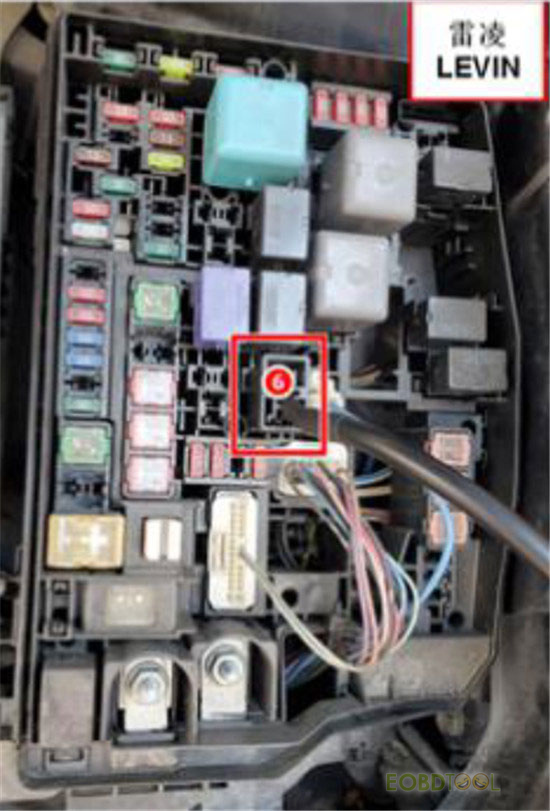
6.Relay plug
7.Battery clip (positive pole)
8.Jumper plug (relay)
9.Jumper plug (fuse blue)
10.Jumper plug (fuse brown)
11.Connect P002 connector TOYOTA-1 female (BENCH)
12.Connect ECU connector TOYOTA-1 female (BENCH)
13.TOYOTA-1 cable12V power supply (BENCH)
The operation steps to do 8A H Blade key AKL programming:
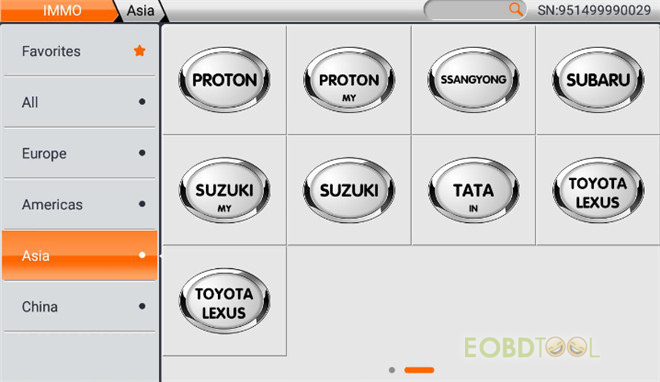
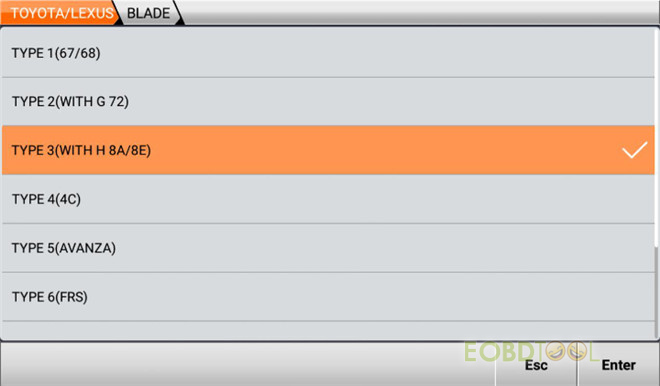
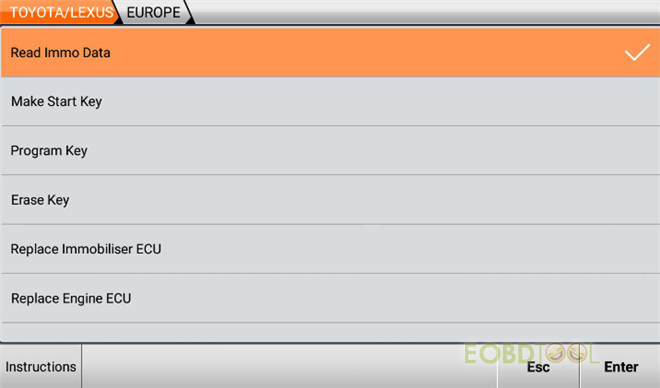
Path: IMMO-> Asia-> TOYOTA/LEXUS-> TOYOTA/LEXUS V32.45-> Manual Select System-> BLADE-> TYPE3 (WITH H 8A/ 8E)-> EUROPE

Main operation guide:
Step 1: Read IMMO Data
Step 2: Make Start key
Step 3: Program key
Step 4: Erase key
The operation instruction (wiring diagram) can be found in step 1.
1.BENCH mode wiring diagram:
2.No need to disassemble:
Step 1: Connect 1, 2, and 3 together
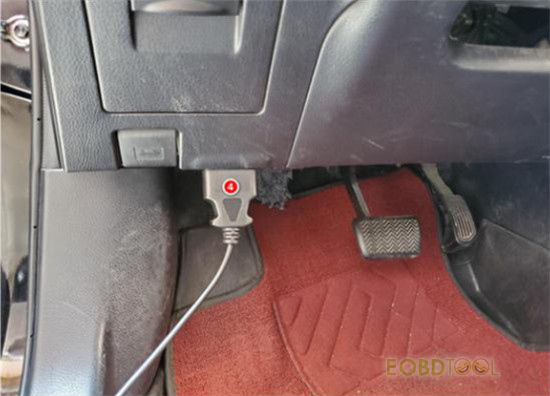
Step 2: Plug 4 into vehicle’s OBDII diag connector
Step 3: Remove the lower shell of the vehicle ignition switch lock, pull out of the ignition switch lock, and plug the ignition switch lock plug into No.5
Step 4:
Method 1: Unplug the IG2 relay, connect 6 to the IG2 relay socket
Method 2: unplug the vehicle fuse, connect No.6 and No.8 by cable color, No.9 and No.10 are plugged into the corresponding fuse sockets (choose according to the model)
e.g. LEVIN by method 1
e.g. REIZ by method 2


Step 5: Remove the position cable of the vehicle from the positive terminal of the battery, clamp the positive terminal with No.7
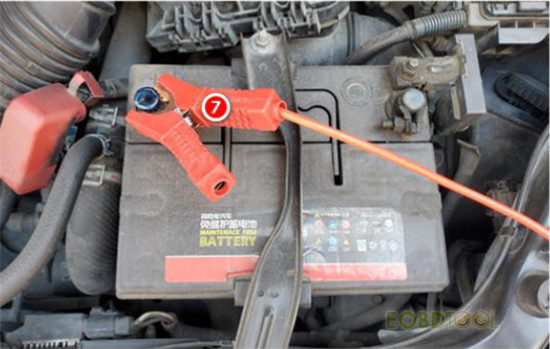
Note: Don’t short-circuit the positive cable with the vehicle body!
Step 6: Select Read Immo Data menu to read immo data and save it to the device (Select the saved data to generate the start key, then proceed to key programming). It is recommended to use the Key SIM to generate the start key.
Step 7: Remove all the connections between the TOYOTA-2 cable and the vehicle, connect the positive cable of the vehicle to the positive terminal of the battery, select the saved immo data to generate the start key, then proceed to key programming.
For the detailed operation steps, just follow the on-screen instruction to operate.
Or click here to read more.
Video demo:
OBDSTAR X300DP Plus Program 8A H BLADE Key for 2017 TOYOTA LEVIN
For more info, please feel free to contact our customer service.
WhatsApp Hotline: +86 159 7293 3706
Skype: Eobdtool.co.uk
Email: sales@eobdtool.co.uk
www.eobdtool.co.uk