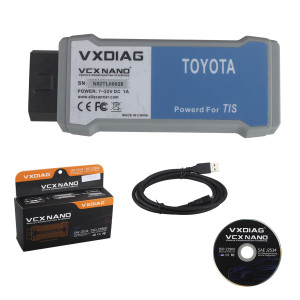
VXDIAG VCX NANO diagnostic scan tool for Toyota is the new replacement of MINI VCI cable with better performance. VCX is a standard Pass-thru programming tool, which can do online ECU programming.
Software version: Techstream V10.10.018
Language: English, French, Italian, Spanish, German, Chinese
Function: supports diagnostic tests, programming matching, custom functions, key programming, etc
Support Toyota models till year 2015 (12V and 24V cars, heavy truck and diesel)
Top feature:
- Fully compatible with SAE J2534;
- Adapters and cables with self-determination;
- Fits CE and FCC hardware;
- Firmware can be updated online.
How to install VXDIAG VCX NANO diagnostic for Toyota?
Step 1: Install Techstream
Open My Computer
Open NANO TOYOTA software CD
Make sure the computer time is the same as your local time
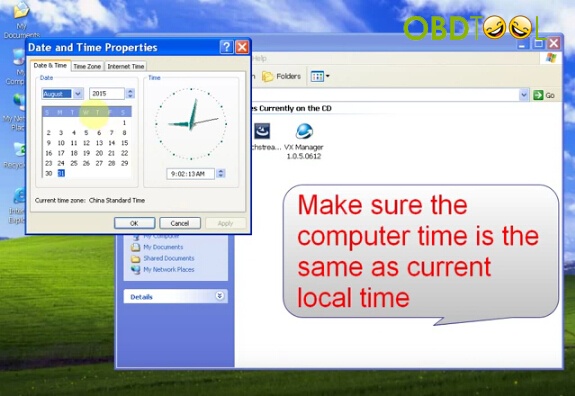
Open Techstream-Setup-10.10.018

Select software language, click Next
Install Techstream software wizard, click Next
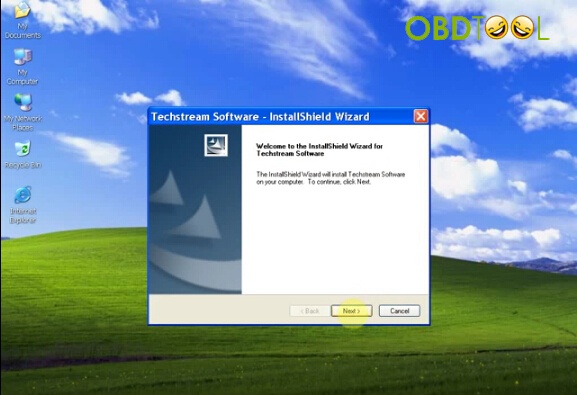
Accept license agreement
Click Next
Confirm user name and company name, press Next
Click “Install”
The procedure will take 10 minutes, please wait patiently
Step 2: Activate Techstream
This will create Tecshtream software shortcut on desktop
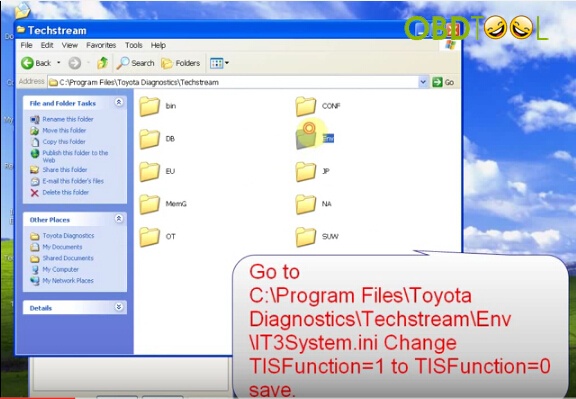
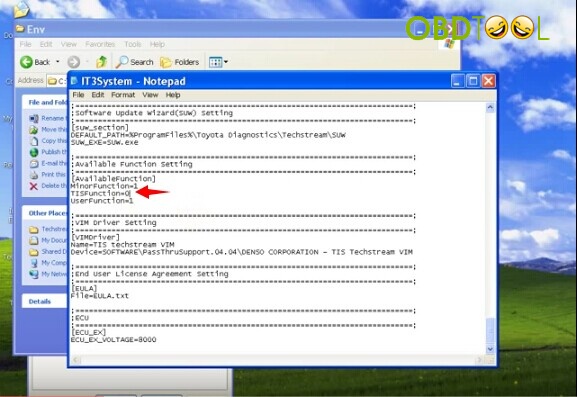
Right click Tecshtream software on desktop, click Properties>>Find Target, go to C:\Program Files\ToyotaDiagnostics\Techstream\bin\VerApp.ini, change TISFunction=1 to TISFunction=0, save it.
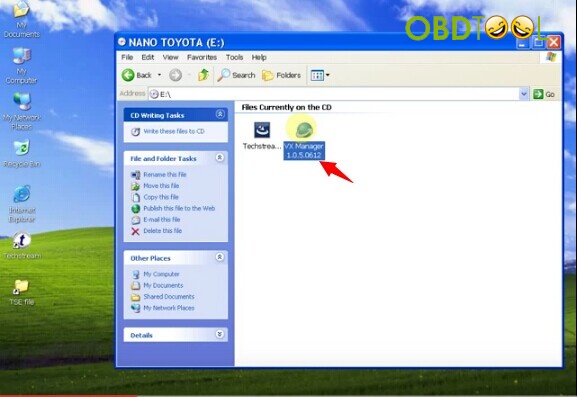
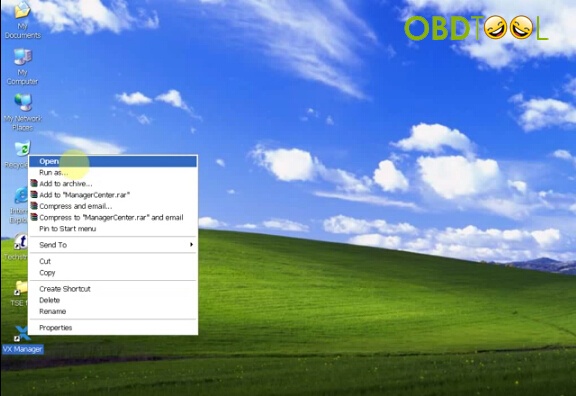
Step 3: Install VX Manager driver
Open VX Manager 1.0.5.0612 driver and install it
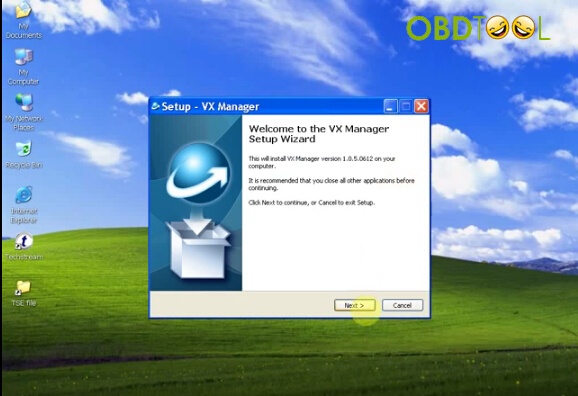
Accept license agreement
Press Next

Press “Finish” when driver is well installed
Step 4: Install device driver
Connect VXDIAG VCX NANO Toyota interface with computer
The system will detect the device driver
Select “Install the software automatically”, press Next
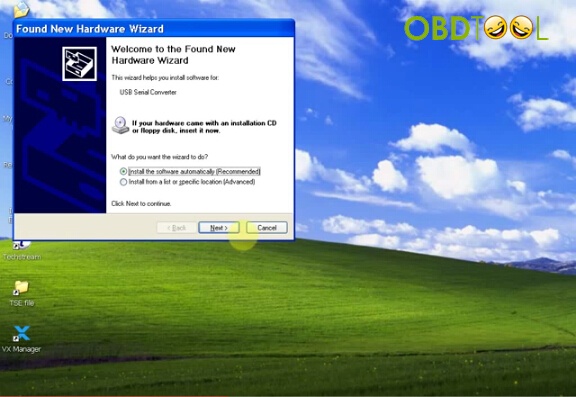
Click “Finish” to complete installation
Install driver again
Step 5: Update software
Open VX Manager driver on desktop
Click “License” to update
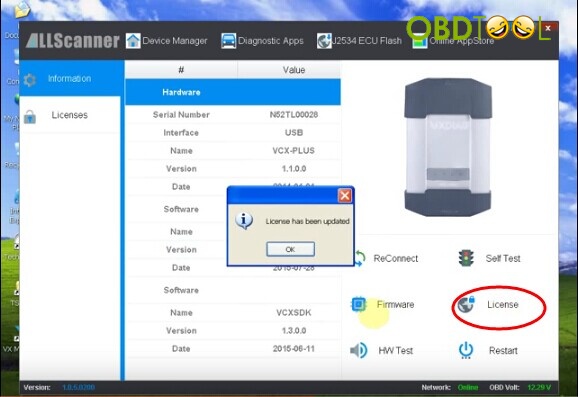
Select “Diagnostic Apps”-> “Toyota TIS”-> “Install” to download latest Techstream software

Step 6: Configure software
Press “Run” button
Select Area
Select software language
Complete repair information as picture below displayed

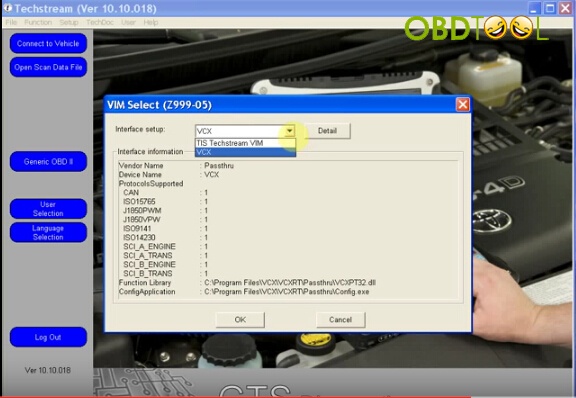
Launch Tecshtream software
Click Setup tab->VIM Select ->select interface setup as “VCX”
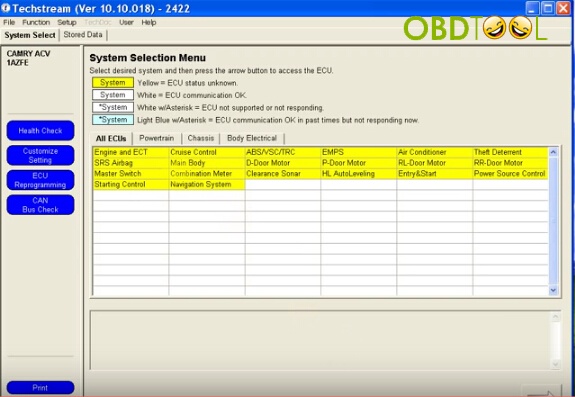
Step 7: Diagnose vehicles
Connect VXDIAG VCA NANO interface with vehicle
Select “Connect to vehicle” in Techstream and wait well communication is built
Select vehicle information

Select system and function you need to diagnose